replace the printheads
If you experience print quality issues that cannot be resolved by cleaning your
printheads and you have verified that the printheads need to be replaced, you
may need to replace them. You may also see front-panel display messages that
indicate when individual printheads need to be replaced.
See the Support and Specifications booklet for information on ordering
replacement printheads.
1
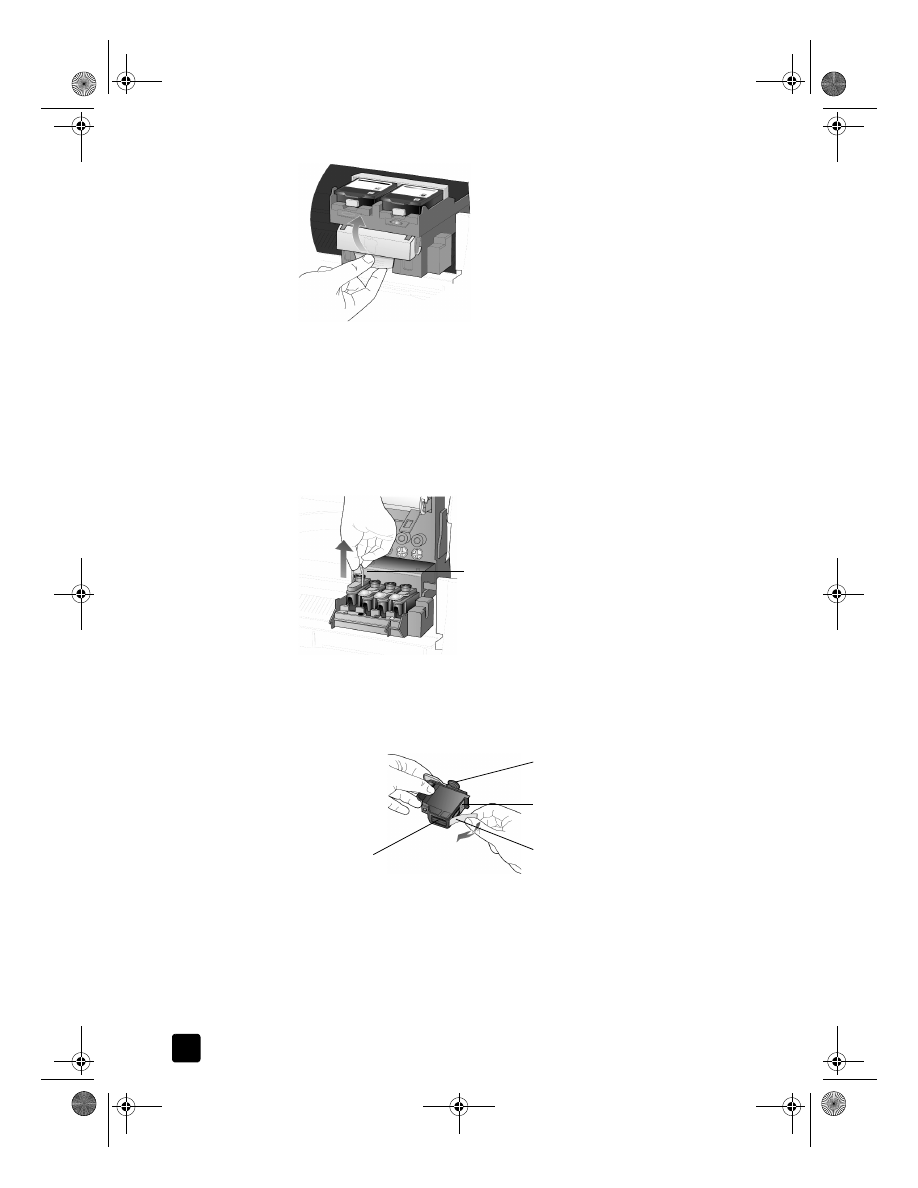
Turn on the unit, then open the print-carriage access door by lifting the
handle until the door locks into place.
The print carriage moves to the center of the unit.
2
After the print carriage stops moving, release the gray print carriage latch
and then lift the print carriage to access the printheads.
GroPlusRG.book Page 61 Wednesday, October 16, 2002 1:16 PM
hp officejet 7100 series
chapter 8
62
Caution! To avoid damaging the printer, remove a printhead only
when a replacement is available. If a printhead is removed
without being replaced:
– Close the print carriage and the print-carriage access door.
– Replace the printhead within 24 hours.
– Never remove an ink cartridge and a printhead at the same time.
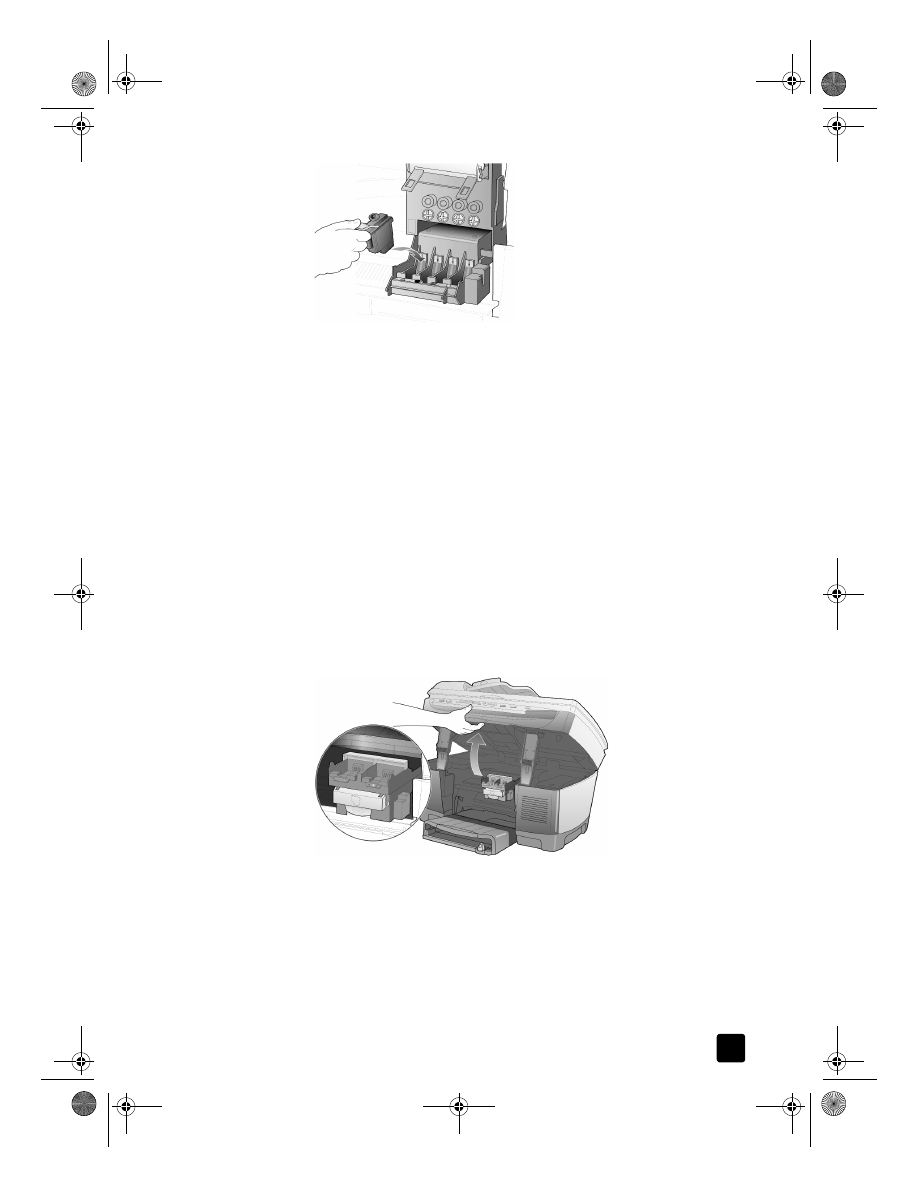
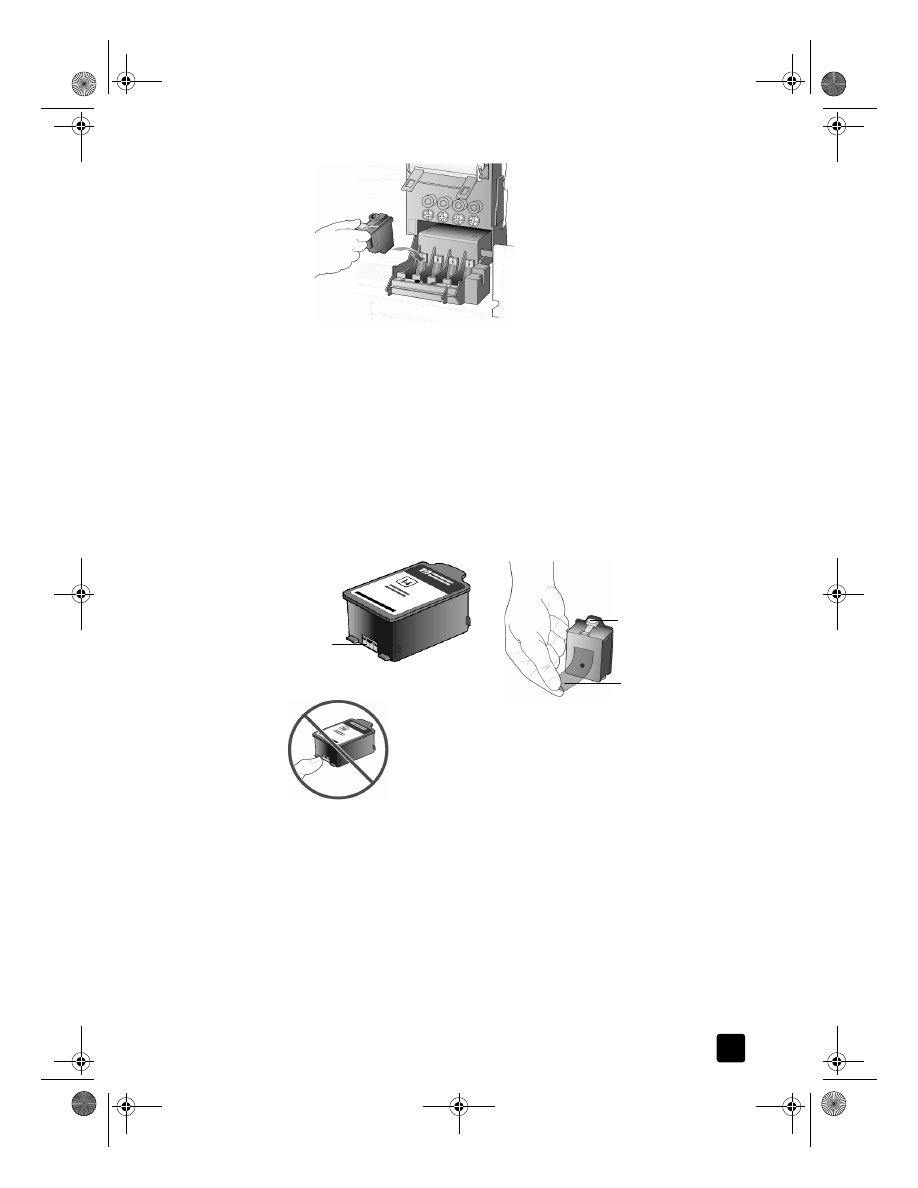
3
Remove the old printhead by lifting the printhead handle and pulling
upward.
4
Remove the new printhead from its packaging and, being careful to touch
only the black plastic, gently remove the plastic tape.
Caution! Do not touch the copper contacts, the printhead tower,
or the ink nozzles.
removing the plastic tape from the printhead
5
Match the color on the top of the printhead to the color on the printhead
carriage.
6
Push the new printhead firmly down into the appropriate slot using the
printhead handle. Do not touch the printhead tower, and do not remove
the printhead handle.
Pull the printhead handle upward
Plastic tape
Printhead tower
Copper contacts
Ink nozzles
GroPlusRG.book Page 62 Wednesday, October 16, 2002 1:16 PM
reference guide
maintain your hp officejet
63
7
Move the print carriage latch down, and make sure the loops catch the
hooks. Snap the latch into place, then close the print carriage access
door.
8
After the message appears in the front-panel display, press Enter to align
the printheads.
A page prints to confirm alignment. You can discard or recycle this page.
If the page does not appear, see the Troubleshooting help, which you
access from the HP Director.